Your one-stop destination for all types of musical instruments, offering a wide range of sales, expert servicing, and bespoke manufacturing of Membranophones Indian instruments. Let the melodious journey begin!
Learn how to boost your musical skills with expert violin playing tips for confidence.
Learning the violin is a rewarding journey that requires patience, discipline, and practice. Whether you’re a beginner or someone who wants to polish their skills, having the right mindset and approach can make a world of difference. In this guide, we’ll share essential tips for playing the violin and how you can boost your confidence along the way. From technique to performance, everything you need to know is covered here.
1. Understand Your Instrument
Before diving into practice, it’s crucial to understand the parts of the violin and how they work together.
Familiarize yourself with the fingerboard, bow, strings, and chin rest.
Learn how the bow interacts with the strings to produce sound.
Know how to properly tighten and rosin the bow for optimal performance.
2. Start with Proper Posture
A confident violin performance begins with good posture.
Stand or sit with a straight back.
Keep your shoulders relaxed and avoid tensing up.
Hold the violin parallel to the floor, resting it gently on your shoulder.
3. Learn the Right Bow Grip
The way you hold the bow impacts both your tone and confidence.
Use a relaxed but firm grip.
Keep your fingers curved and your thumb bent.
Avoid gripping the bow too tightly, which can lead to tension.
4. Master the Basics Before Moving On
Building a strong foundation is key to long-term success.
Focus on basic scales and bowing exercises.
Practice slow and accurately rather than rushing.
Record yourself to evaluate intonation and technique.
5. Create a Structured Practice Routine
Consistency is vital in building both skills and confidence.
Practice for 30–60 minutes daily with short breaks.
Divide your session into warm-up, technique, and repertoire.
Set specific goals for each session.
6. Practice Mindfully
Deliberate practice is more effective than aimless repetition.
Concentrate on one element at a time (e.g., rhythm or dynamics).
Stay mentally engaged and avoid multitasking.
Reflect on what worked and what needs improvement.
7. Record and Review Your Sessions
Self-evaluation can drastically improve performance.
Use video or audio recordings to monitor your progress.
Take notes on areas to work on.
Celebrate small wins to boost motivation.
8. Play Along with Backing Tracks
Accompaniment can enhance musicality and confidence.
Use online backing tracks or music apps.
Start with slow tempos and gradually increase speed.
Try duets with a teacher or peer.
9. Perform Regularly
The more you perform, the more confident you’ll become.
Start with family and friends as your audience.
Join local recitals or community orchestras.
Treat each performance as a learning experience.
10. Develop Mental Resilience
Confidence is as much mental as it is physical.
Practice deep breathing or meditation to manage performance anxiety.
Visualize successful performances.
Accept mistakes as part of growth and move on quickly.
11. Seek Feedback
Guidance from a teacher or mentor is invaluable.
Schedule regular lessons with a qualified instructor.
Ask for constructive criticism and implement it.
Don’t shy away from advice—even tough feedback helps.
12. Join a Community
Support from fellow learners can be very encouraging.
Participate in online violin forums or groups.
Attend workshops, masterclasses, or summer music camps.
Collaborate with other musicians for ensemble playing.
13. Choose the Right Pieces
Playing music that excites and challenges you makes practice enjoyable.
Select pieces suited to your level.
Explore different genres beyond classical.
Include fun and familiar tunes in your practice.
14. Upgrade Your Equipment When Necessary
Better tools can improve sound and ease of playing.
Use high-quality rosin and strings.
Consider upgrading your bow or violin if progress stalls.
Make sure your instrument is regularly maintained.
15. Stay Inspired
Keeping your passion alive is the secret to long-term success.
Listen to violinists you admire.
Watch live performances and videos.
Remind yourself why you started learning the violin.
Conclusion
Playing the violin is a beautiful blend of technique, emotion, and perseverance. With the right tips for playing the violin, anyone can grow from a hesitant beginner to a confident performer. Remember, progress takes time—but with patience and consistent effort, the joy of making music will be well worth it. Keep your practice focused, your goals clear, and your heart in the music. That’s how true confidence is built on the strings of a violin.
Discover what to know before buying your first keyboard with expert tips for beginners
Choosing your first keyboard can be both exciting and overwhelming. Whether you’re starting your musical journey or purchasing for a child or loved one, getting the right keyboard is essential. In this guide, we’ll walk you through everything you need to know before buying your first keyboard—so you can make a smart, confident choice and begin playing with ease and enthusiasm.
1. Understand Your Purpose
Before heading to the music store or shopping online, determine why you’re buying a keyboard.
Are you buying it for casual learning, school performance, or long-term musical development?
Will the keyboard be used by a child or an adult?
Are you looking to eventually transition to a piano?
Your purpose will help decide everything from budget to size and features.
2. Decide Between Keyboard and Digital Piano
A common beginner mistake is confusing a keyboard with a digital piano. They might look similar but serve different purposes.
Keyboards are lighter, portable, and have a wide range of sounds and rhythms.
Digital pianos simulate acoustic piano experience with weighted keys and authentic sound but are bulkier.
If you’re aiming to learn piano, go for a digital piano. If you’re exploring music creatively, a keyboard might be better.
3. Set a Budget That Makes Sense
Keyboards come in a wide price range—from budget-friendly beginner models to professional-grade instruments.
Beginner keyboards start around ₹6,000–₹15,000.
Mid-range keyboards with better features range from ₹15,000–₹30,000.
Premium digital pianos start at ₹30,000 and go beyond ₹80,000.
Choose a budget that aligns with your musical goals, and consider brands with a good resale value.
4. Consider Number of Keys
The number of keys directly impacts how much music you can play:
61 keys – Most common for beginners. Great for learning and portability.
76 keys – Offers more range for intermediate players.
88 keys – Full piano range. Ideal if you’re serious about piano training.
If you’re buying for a child or new learner, 61 keys are perfect to start with.
5. Look for Touch Sensitivity and Weighted Keys
Not all keyboards feel like a real piano. Important features to consider include:
Touch-sensitive keys: The harder you press, the louder the sound—just like a real piano.
Weighted keys: These mimic the resistance of a real piano. Great for muscle development.
A keyboard without touch sensitivity can limit your expression and growth.
6. Explore Sound Quality and Polyphony
Good sound makes a huge difference when learning. Check:
Voice variety – Does the keyboard offer multiple instrument sounds?
Polyphony – Refers to how many notes can play at once. Minimum 32-note polyphony is good for beginners.
Sound engine – A better sound engine gives a more realistic tone.
Avoid keyboards with flat, dull tones—especially if your goal is long-term learning.
7. Check Built-in Features and Connectivity
Beginner keyboards often come with useful tools and functions:
Learning modes and built-in lessons.
Accompaniment features for rhythm support.
USB or MIDI ports for connecting to learning apps or computers.
Sustain pedal input – Important for classical training.
Recording features – Helpful for practice and review.
These extras can accelerate your learning process.
8. Evaluate Brand Reputation and After-Sales Support
Some brands are better known for their durability and support. Top keyboard brands include:
Yamaha
Casio
Roland
Korg
Choose a brand that’s easily serviceable in your city. Check for warranty, spare parts availability, and service center access.
9. Try Before You Buy (If Possible)
Whenever possible, test the keyboard before purchasing. Pay attention to:
Key action and response.
Volume range and sound quality.
Weight and ease of use.
Display clarity and control layout.
If buying online, watch demo videos and read customer reviews to get a feel for the product.
10. Don’t Forget Essential Accessories
To start playing comfortably, you might need:
Keyboard stand – Adjustable height for sitting or standing.
Bench or stool – Comfort is key during long practice sessions.
Sustain pedal – Mimics piano sound holding.
Headphones – Practice silently without disturbing others.
Carrying case or cover – Protect your instrument from dust and damage.
Some beginner packages include these accessories—check before buying separately.
11. Age and Hand Size Matter
For children under 8 years, lightweight keyboards with smaller keys can be better. As they grow, transition to standard key sizes. Adults should always go for full-size keys to develop proper technique.
12. Think About Portability
If you plan to carry your keyboard to classes, gigs, or school events:
Choose a model under 8kg.
Look for a battery-powered option.
Ensure it comes with a compact adapter and gig bag.
Portability should never come at the cost of essential features, so balance wisely.
13. Consider Online vs. Offline Purchase
Buying online might be more cost-effective, but visiting a store has its advantages:
Try before you buy.
Ask questions and get personal recommendations.
Take advantage of in-store service and setup.
If ordering online, buy only from reputed platforms or directly from the brand’s website.
14. Beware of Second-Hand Traps
A used keyboard may seem like a good deal but check:
Missing keys or broken buttons.
Speaker issues or buzzing.
Battery corrosion.
Outdated models without current features.
Unless you’re experienced or guided by a teacher, avoid second-hand deals as a beginner.
15. Learning Support Is Key
No matter how good your keyboard is, it’s your learning that matters most.
Choose keyboards with built-in learning apps or lesson modes.
Subscribe to online music platforms or YouTube tutorials.
Consider enrolling in beginner keyboard classes near you or online.
The combination of good gear and consistent practice creates musical success.
Conclusion
Choosing the right keyboard doesn’t have to be difficult. With a clear understanding of your purpose, budget, and musical goals, you can confidently select a keyboard that supports your journey. Remember to prioritize features like touch sensitivity, sound quality, and brand reliability. Most importantly, pair your keyboard with consistent practice and learning resources. Whether you’re a young learner or an adult beginner, the right keyboard is your first step toward an exciting musical future. So, don’t wait—make that smart choice today and let your music journey begin.
Discover how to maintain your guitar for longevity with expert care tips
Your guitar is more than just an instrument—it’s a personal companion, a creative outlet, and often a major investment. Whether you’re a beginner strumming your first chords or a seasoned player performing gigs, knowing how to maintain your guitar for longevity is essential. Proper care can preserve its sound, feel, and appearance for decades. This guide walks you through expert tips and practical routines to keep your guitar in peak condition, ensuring it continues to inspire you for years to come.
1. Understand the Materials of Your Guitar
Each guitar is crafted from different tonewoods and materials that respond to environmental conditions uniquely.
a. Know Your Wood Type
Mahogany, rosewood, spruce, and maple all react differently to temperature and humidity. Understanding this can help you make better decisions about storage and cleaning.
b. How Wood Affects Durability
Over time, neglecting wood care can lead to warping, cracking, or swelling. This impacts playability and tone.
c. Finish Type Matters
Guitars have various finishes like nitrocellulose or polyurethane. Each requires specific cleaning products.
2. Cleaning Your Guitar Properly
Routine cleaning goes a long way in maintaining a guitar’s look and sound.
a. Wipe Down After Each Session
Use a soft, lint-free cloth to remove sweat, oils, and dust from the strings, fretboard, and body.
b. Deep Cleaning
Every few weeks, use a cleaner specifically made for your guitar’s finish. Avoid household cleaners.
c. Fretboard Conditioning
For rosewood or ebony fretboards, apply a fretboard conditioner (like lemon oil) sparingly once or twice a year.
3. Changing Strings Regularly
Strings influence tone and playability. Worn-out strings affect performance and can damage your fretboard.
a. Signs You Need New Strings
Dull sound, difficulty staying in tune, or visible rust are indicators it’s time to change.
b. How Often to Change Strings
For regular players, every 2-4 weeks is recommended. Occasional players can go 1-2 months.
c. Proper String Removal
Always remove strings one at a time to maintain neck tension and avoid warping.
4. Maintaining Tuning Hardware and Bridge
Your guitar’s mechanical parts also need care.
a. Tighten Tuning Pegs
Loose tuning machines can affect tuning stability. Use a screwdriver carefully to adjust them.
b. Lubricate the Nut and Bridge
A little graphite (from a pencil) on nut slots can prevent string binding and tuning issues.
c. Clean the Bridge
Use a soft brush or dry cloth to remove dust and grime around the bridge and saddle
.
5. Adjusting the Neck and Truss Rod
This should be done with care, as improper adjustments can damage the guitar.
a. Identify Neck Issues
Too much neck bow can cause string buzz. Too little can make the action too high.
b. Use the Right Tool
Truss rod adjustments should be minimal—an eighth of a turn at a time.
c. Seek Professional Help
If unsure, consult a guitar tech to avoid permanent damage.
6. Storing Your Guitar the Right Way
Where and how you store your guitar directly impacts its longevity.
a. Use a Hard Case or Gig Bag
Avoid leaving your guitar exposed. A quality case protects it from humidity and physical damage.
b. Avoid Extreme Temperatures
Keep your guitar in a climate-controlled environment. Avoid car trunks, radiators, and direct sunlight.
c. Use a Guitar Stand or Wall Mount
If displaying your guitar, ensure the stand has rubber or foam that won’t react with the finish.
7. Humidity Control and Its Importance
Wood instruments are sensitive to humidity changes.
a. Ideal Humidity Range
Keep your guitar between 45–55% humidity.
b. Use a Humidifier/Dehumidifier
Place a soundhole humidifier in your acoustic guitar during dry seasons. Use a room humidifier or silica gel for storage in humid areas.
c. Watch for Symptoms of Poor Humidity
Low humidity causes cracks and sharp fret ends; high humidity results in swelling and high action.
8. Polish and Cosmetic Maintenance
Appearance matters—not just for looks, but for value and preservation.
a. Use Guitar Polish
Apply high-quality polish with a microfiber cloth to the body—never on the fretboard.
b. Avoid Over-Cleaning
Polishing too often can damage finishes. Do this once every few months.
c. Fixing Minor Scratches
Micro-scratches can be buffed out using polish, but deeper ones may require professional repair.
9. Protecting Electronics (for Electric Guitars)
Electric guitar components need occasional maintenance too.
a. Clean the Input Jack
Use contact cleaner on the jack to remove dust and ensure clear signal transmission.
b. Check Wiring and Pickups
Loose wiring can cause noise. Inspect and tighten connections if needed.
c. Avoid Moisture Exposure
Store electric guitars away from damp spaces to prevent corrosion.
10. Schedule Professional Check-Ups
Like cars, guitars benefit from regular professional checkups.
a. Annual Setup
Have a luthier or technician do a full setup once a year—this includes action adjustment, neck check, and intonation.
b. Fret Dressing
Over time, frets wear down. A fret dress restores smooth playability.
c. Spotting Hidden Issues
Pros can detect early signs of structural issues that you might miss.
Conclusion
Taking care of your guitar isn’t just about maintaining an instrument—it’s about preserving your musical journey. With just a few minutes of attention every time you play, you can ensure your guitar remains in excellent condition for years, maybe even a lifetime. Remember, consistency is key. Whether it’s wiping down the strings, storing it in a safe place, or changing strings regularly, each small step contributes to the bigger goal: ensuring your guitar stays as beautiful and playable as the day you first picked it up. Now that you know how to maintain your guitar for longevity, you’re set to enjoy a long and melodious relationship with your six-string companion.
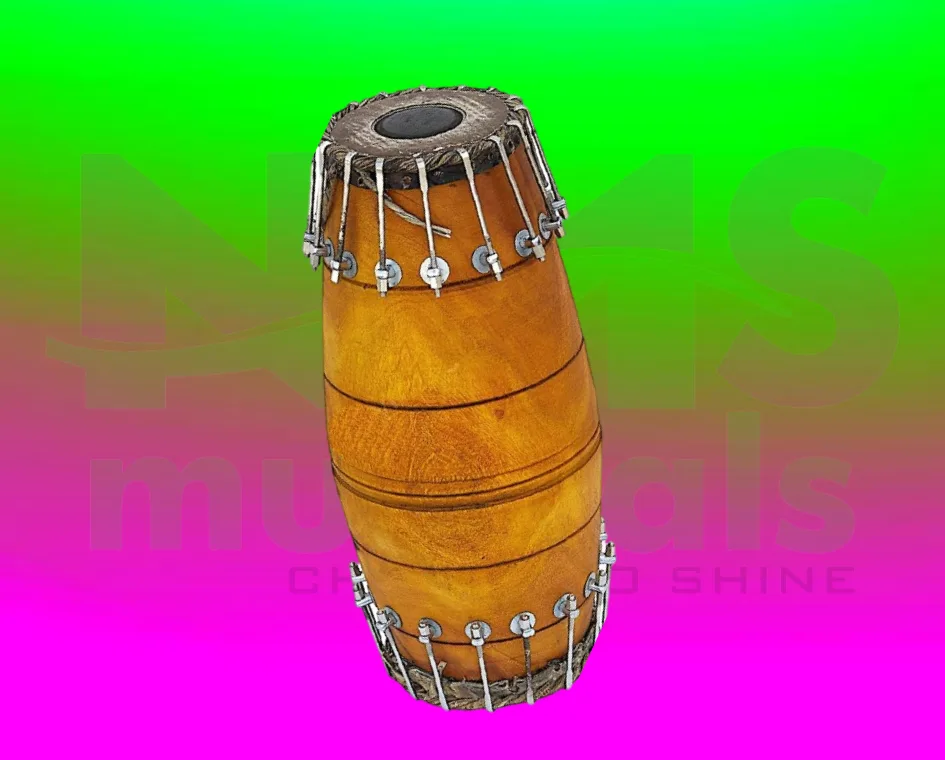
The Mridangam is one of the most revered percussion instruments in Indian classical music, particularly in the Carnatic tradition. With its deep cultural roots and rhythmic complexity, it forms the backbone of many classical music ensembles. If you’re a music enthusiast or a beginner intrigued by Indian classical instruments, understanding the basics of the Mridangam and how to play it can be a rewarding journey. This blog will provide a comprehensive introduction to the Mridangam, including its structure, playing techniques, and essential beginner tips to get you started.
1. What Is the Mridangam?
The Mridangam is a double-headed drum traditionally made from jackfruit wood, with two drum heads stretched over the shell. It is played using fingers and palms to produce intricate rhythmic patterns known as “talas.” The right head (valantalai) produces treble sounds, while the left head (idantalai) provides bass tones. Together, they create a rich and dynamic rhythmic soundscape.
2. Historical and Cultural Significance
The Mridangam has been mentioned in ancient scriptures and sculptures, symbolizing rhythm in Hindu mythology. It has historically been associated with temple rituals and is an integral part of Carnatic concerts. Legends like Palghat Mani Iyer and Umayalpuram K. Sivaraman have elevated the status of the Mridangam with their mastery, inspiring countless new learners across generations.
3. Anatomy of the Mridangam
Understanding the construction of the Mridangam is essential for any beginner:
Shell (Body): Usually carved from a single block of jackfruit wood, known for its durability and sound resonance.
Valantalai (Right Head): Made of multiple layers of skin with a black patch (satham or karanai) at the center that fine-tunes the sound.
Idantalai (Left Head): Slightly larger and produces bass; layered similarly without a central black spot.
Straps and Tuning Blocks: Leather straps are used to stretch and tune the drum, supported by tuning blocks inserted between the straps.
4. Why Learn the Mridangam?
There are several reasons to start learning the Mridangam:
Enhances rhythm and timing skills
Complements vocal and instrumental music
Deepens understanding of Indian music theory
Builds concentration and discipline
Connects you to an ancient musical tradition
5. Basic Posture and Hand Position
Before playing, you must learn how to sit and place the Mridangam:
Sit cross-legged on the floor
Place the Mridangam horizontally across your legs
The treble head should be on your right (if you’re right-handed)
Keep your back straight and hands relaxed
Hand positions vary depending on the strokes. Your right hand should be flexible with finger taps and rolls, while your left hand delivers deeper bass strokes using a more open palm motion.
6. Introduction to Talas (Rhythmic Cycles)
Talas are rhythmic cycles forming the foundation of Mridangam playing. Some of the common talas for beginners include:
Adi Tala (8 beats)
Rupaka Tala (3 beats)
Jhampa Tala (10 beats)
Each tala is broken into angas (parts), and learners are trained to count and recite solkattu (spoken syllables) to understand the rhythmic structure before playing.
7. Solkattu – The Language of Rhythm
Solkattu is a system of vocal percussion that uses syllables like tha, dhi, thom, nam, and ki to represent different strokes. Before playing on the drum, students are taught to chant solkattu patterns to build a mental map of the rhythm. This method helps in internalizing the structure and preparing for improvisation.
Tha: Played on the right head using the index and middle fingers
Dhi: Played on the left head using the full palm
Thom: Resonant bass stroke on the left head
Nam: Sharp stroke using the edge of the right head Beginners practice these strokes in combinations to create simple rhythmic exercises called sarvalaghu (free-flowing rhythm patterns).
9. Learning with a Guru or Online Classes
Traditionally, Mridangam is taught through the guru-shishya parampara (teacher-disciple tradition). However, modern platforms also offer quality online tutorials and structured lessons. Choosing the right teacher who can explain both theory and technique is crucial. Repetition, patience, and consistent practice are essential for improvement.
10. Common Mistakes Beginners Make
Here are some pitfalls new learners should avoid:
Incorrect hand posture leading to injury or poor sound
Skipping solkattu practice
Not tuning the drum properly
Rushing into complex talas without mastering the basics
Neglecting practice consistency
Awareness of these mistakes helps learners develop correct techniques and progress steadily.
11. Daily Practice Routine
A good daily routine includes:
5–10 minutes of solkattu recitation
10–15 minutes of single-stroke exercises
15–20 minutes of tala-based patterns
Regular listening to Mridangam solos and Carnatic concerts
Gradually increase practice duration and complexity as your muscle memory and rhythm sense develop.
12. Tuning and Maintenance
Tuning is done by adjusting the leather straps using a stone or hammer. Beginners should seek guidance from their teacher before attempting this alone. Regular maintenance involves:
Keeping the drum away from moisture
Covering it with a cloth when not in use
Avoiding direct sunlight or extreme heat
Proper care extends the life of the instrument and ensures consistent sound quality.
13. Understanding Mridangam Notation
Mridangam compositions are often written in syllabic notation. Learning to read and write these can help in remembering lessons, composing new patterns, and collaborating with other musicians. As you advance, you’ll start to understand complex compositions called korvais and mohra that conclude rhythmic solos.
14. Role of Mridangam in Ensemble Performance
In Carnatic music, the Mridangam is not just a timekeeper—it is a co-performer. It:
Highlights the structure of kritis (songs)
Complements the mood of the raga
Engages in tani avartanam (solo performance) showcasing the artist’s skill Learning how to listen and respond to other musicians is vital for ensemble play.
15. Recommended Resources for Beginners
Books, websites, and channels to explore:
“Mridangam for Beginners” by Karaikudi R. Mani
YouTube channels like Acharyanet, IndianRaga
Online classes on platforms like Shankar Mahadevan Academy
Concerts and recordings by Palghat Mani Iyer, Trichy Sankaran
These resources offer theoretical knowledge, live demonstrations, and practice tips.
Conclusion
Understanding the basics of the Mridangam and how to play it is more than just a musical endeavor—it’s a journey into rhythm, discipline, and tradition. As a beginner, you’re not only learning how to strike a drum, but how to feel and express rhythm through your hands, mind, and spirit. The Mridangam teaches you patience, focus, and a deep appreciation for Indian classical music. With dedication and the right guidance, anyone can learn to play this majestic instrument and be part of a legacy that dates back centuries. So grab your Mridangam, sit down, and let your rhythm speak.
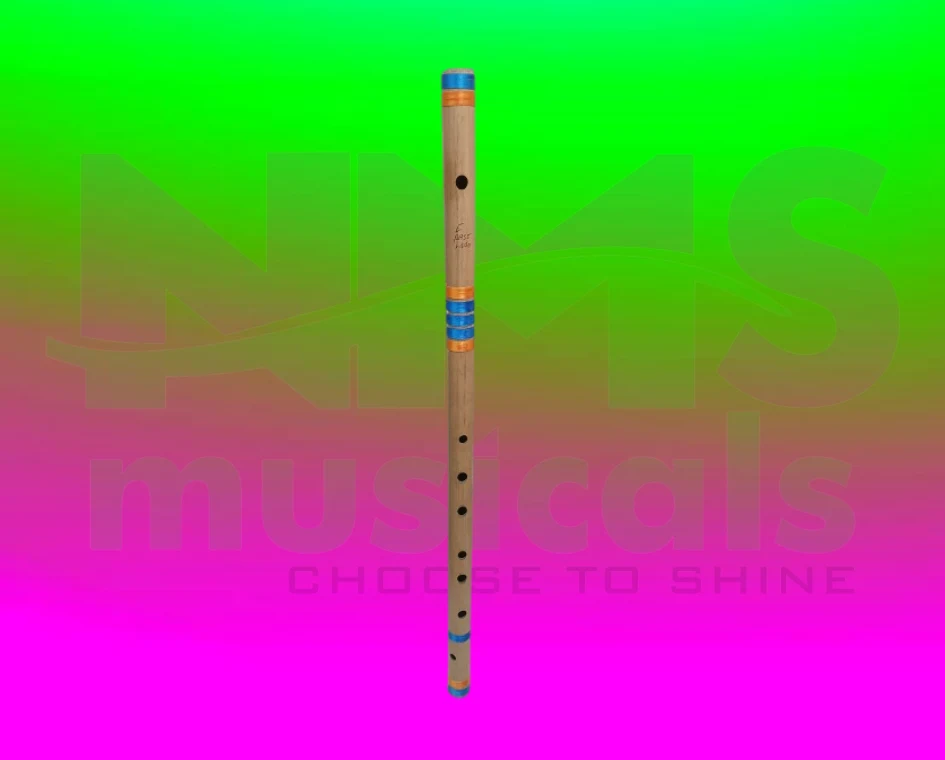
Your complete beginner’s guide to how to play the flute for beginners
Learning how to play the flute and what you need to know as a beginner is an exciting journey filled with rhythm, melody, and soul. The flute is one of the most ancient and spiritual instruments in Indian music, known for its soothing tone and expressive range. Whether you’re exploring the bansuri in Hindustani music or the venu in Carnatic traditions, this guide will walk you through everything from choosing the right flute to mastering your first ragas. Let’s dive into the basics of becoming a confident and joyful flute player.
1. Understanding the Flute: Western vs. Indian Flutes
There are two main types of flutes beginners encounter: Western metal flutes and Indian bamboo flutes.
Western concert flute: Typically made of metal, suited for Western classical or pop.
Indian flutes: Includes bansuri (Hindustani) and venu (Carnatic), made of bamboo with a rich, earthy tone.
If your focus is on Indian music, the bansuri or venu is the perfect starting point.
2. Choosing the Right Flute for Beginners
Picking the right flute depends on your comfort, budget, and learning goals.
For absolute beginners: Choose a medium-length flute (C scale or E base).
Material: Indian flutes are traditionally bamboo—lightweight and warm in tone.
Finger spacing: Shorter flutes (like G or A) are easier to handle for small hands.
Buy from reputed Indian brands like Punam Flutes, Subhash Flutes, or Harshwardhan Flutes for quality assurance.
3. Learning the Flute: What You Need to Start
Before you begin playing, gather these basic items:
A good-quality beginner bamboo flute
Tuner app (like Tanpura Droid or NaadSadhana)
Soft cloth for cleaning the flute
Metronome or rhythm app for tala practice
These tools help you stay in tune and practice rhythmically from day one.
4. How to Hold and Blow Into the Flute Properly
This is the first major challenge for beginners.
Posture: Sit upright or stand straight.
Grip: Use your left hand on the top holes and right hand on the bottom.
Blowing technique: Your lower lip should rest on the blow hole. Blow gently across it—don’t force air into it.
Practice finding the sweet spot where the flute produces a clear tone. Patience is key.
5. Understanding Swaras and Indian Notes
Indian classical music uses swaras, or notes, as the foundation for ragas. These are:
Sa, Re, Ga, Ma, Pa, Dha, Ni (like Do-Re-Mi in Western music)
Each scale on your flute corresponds to a different set of swaras. Beginners typically start with the C scale or E base flute, which allows for easier practice of basic ragas.
6. First Practice: Sa to Pa on the Flute
Your first lesson will be playing from Sa to Pa:
Cover the appropriate holes
Blow gently and hold each note
Practice ascending (Aaroh) and descending (Avaroh)
Start with a slow tempo and increase as you gain control over breath and finger movements.
7. Introduction to Basic Ragas for Beginners
Learning ragas builds your melodic understanding. Beginner-friendly ragas include:
Raga Bhoopali (Hindustani)
Raga Mohanam (Carnatic)
Raga Yaman (after some practice)
These ragas are pentatonic and easy to learn. They don’t use complex note shifts, making them ideal for early mastery.
8. Finger Placement and Movement Tips
Don’t press too hard—just enough to close the hole.
Practice meend (slides) and gamaka (ornamentation) slowly.
Keep your hand relaxed and avoid overextending fingers.
Good technique ensures clarity and expression in your music.
9. Breathing Techniques for Better Sound
Controlling breath is crucial:
Use abdominal breathing for longer notes.
Avoid shallow or forced breathing.
Take silent breaths between phrases.
Use simple exercises like holding Sa for 8 seconds and gradually increasing your endurance.
10. Building a Daily Practice Routine
Create a routine you can stick to:
Warm-up: 5 mins of blowing exercises.
Swaras: 10 mins of scale work.
Ragas: 15 mins learning one raga.
Improvisation or Jamming: 5-10 mins free play.
Practice with a tanpura app or tabla loop to build rhythm and tonal awareness.
11. Learning from a Guru vs. Online Classes
While online tutorials are helpful, Indian classical music thrives through personal teaching (guru-shishya parampara). If possible:
Learn from a trained flautist.
Attend local music classes or workshops.
Use platforms like YouTube or Udemy for extra practice.
Hybrid learning (both in-person and online) often works best.
12. Indian Flute in Modern and Fusion Music
Flutes are not just for classical—many Indian musicians use them in:
Bollywood background scores
Indie-fusion bands
Devotional albums
Film soundtracks and electronic music
Explore artists like Rakesh Chaurasia, Pravin Godkhindi, and Nagaraju Talluri for inspiration.
13. Mistakes Beginners Should Avoid
Blowing too hard and creating a shrill tone
Holding the flute incorrectly
Skipping basic swara practice
Ignoring tuning and breath control
Using a flute that’s too long or difficult
Stay patient and focus on one step at a time.
14. Best Indian Flutes for Beginners
Some great beginner options in India include:
Punam Flutes C Medium
Harshwardhan Flutes E Bass
Subhash Flutes G Sharp
They are known for professional tuning, good resonance, and affordability.
15. Budget Guide for New Learners
A decent Indian bamboo flute ranges between ₹700 and ₹2000. Add ₹300-500 for accessories like cleaning cloth, flute stand, and carry case. Beginners don’t need to spend more than ₹2500 initially.
16. Joining Indian Flute Communities
Being part of a community helps you stay motivated. Join:
Facebook groups like “Flute Learners of India”
Subreddits like r/IndianClassicalMusic
WhatsApp or Telegram groups for flute practice tips
These are excellent platforms to get advice and connect with others on the same path.
17. Tips for Practicing Ragas on the Flute
Break down each raga into 3-note and 5-note patterns.
Practice with a tabla loop to develop rhythm.
Sing the raga before playing—this improves tone memory.
Use apps like NaadSadhana for real-time feedback and tuning.
Practice patience. Even advanced players spend hours repeating the basics.
18. Recording and Improving Your Playing
Recording your practice is the fastest way to improve.
Use your phone or a basic microphone.
Listen to your tone, breath control, and transitions.
Compare recordings weekly to track your progress.
Make it a habit to record once a week and listen critically.
19. Exploring Different Indian Flute Styles
Hindustani Style (North India): Emphasizes long notes, microtones, and mood.
Carnatic Style (South India): Faster phrases, intricate gamakas, and rhythmic compositions.
Contemporary Fusion: Blends classical with modern sounds using effects or background scores.
Try both styles to expand your musical vocabulary.
20. Staying Inspired on Your Flute Journey
Watch live concerts, listen to flute renditions of your favorite ragas, and challenge yourself with new compositions. Music is not just a skill—it’s a spiritual and emotional experience in Indian tradition. Let the sound of your flute express the beauty within.
Conclusion
Learning how to play the flute and what you need to know as a beginner can seem overwhelming at first—but with patience, practice, and the right guidance, anyone can begin their journey. Indian flutes like the bansuri and venu hold deep cultural and musical significance, offering a soulful and meditative sound that connects directly with the heart. Focus on your breath, enjoy your progress, and allow the melodies you create to grow alongside you. Whether you’re playing a morning raga or jamming along with friends, your flute will become your companion in a lifelong musical exploration.
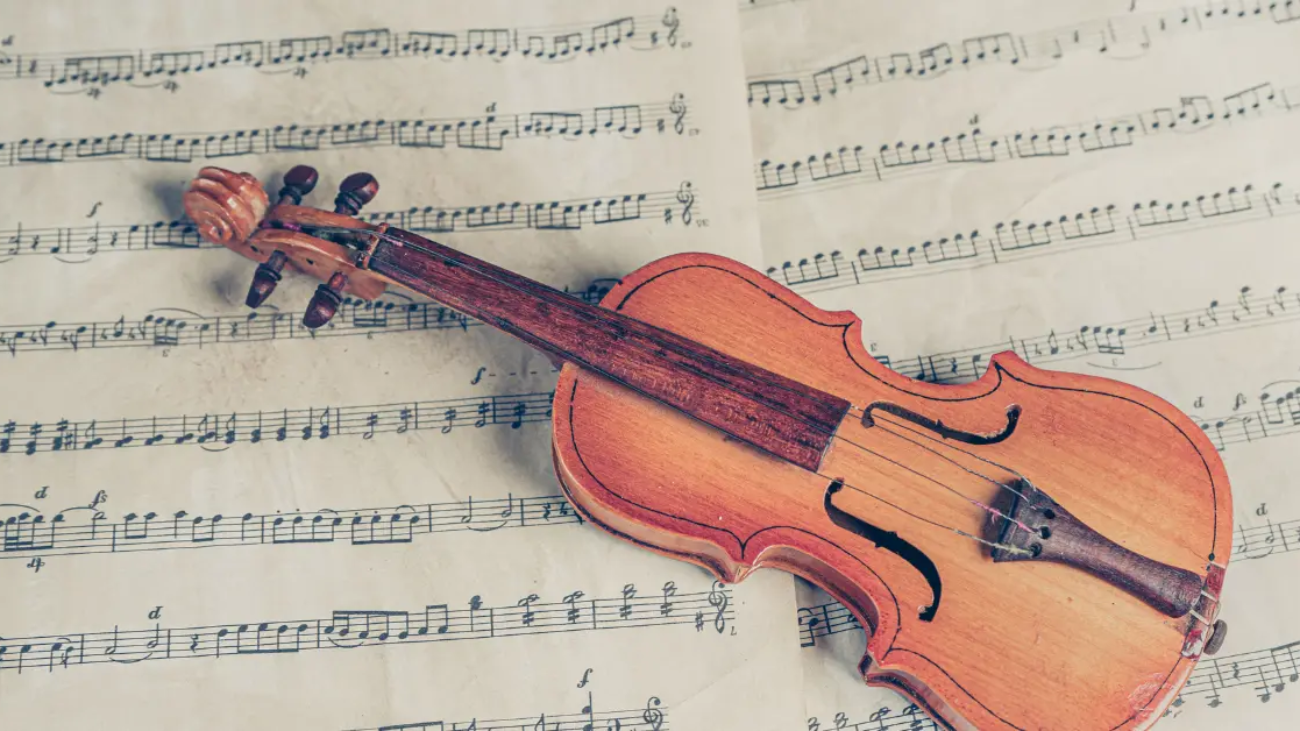
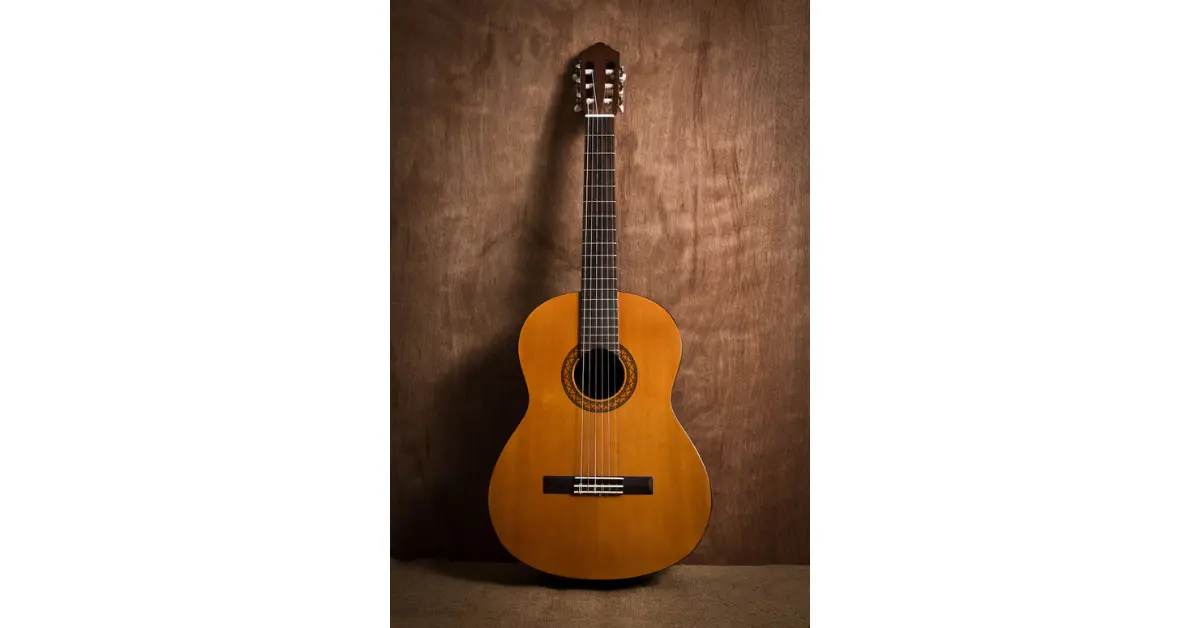
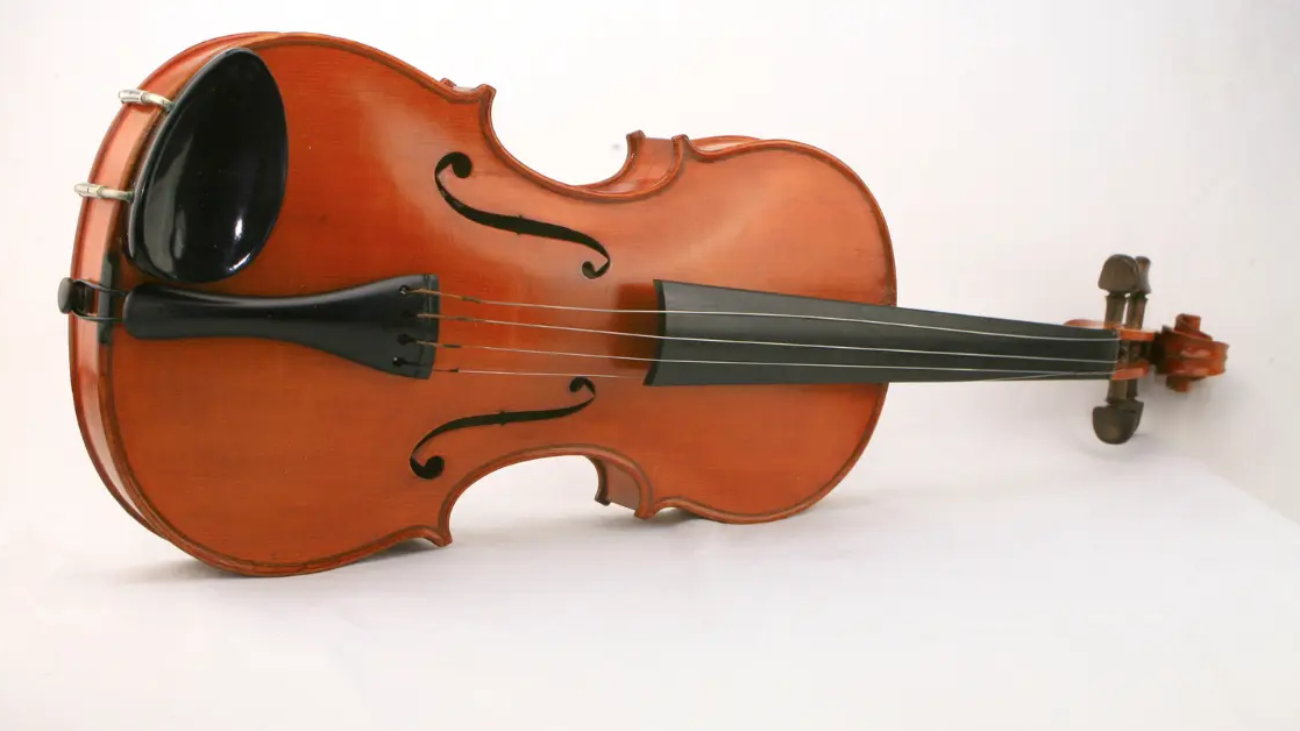
How to choose the right violin for beginners with expert-backed tips for perfect tone, comfort, and lasting quality
Starting your musical journey with the violin can be an exciting and fulfilling experience—but choosing the right instrument as a beginner can feel overwhelming. With so many options in sizes, materials, brands, and prices, it’s easy to get confused. Knowing how to choose the right violin for beginners is the first step in setting the stage for a smooth and enjoyable learning process. Whether you’re buying for yourself, a child, or a student, this guide will help you make a confident, informed decision to match the player’s needs and goals.
1. Understand the Importance of the Right Violin
Choosing the correct violin isn’t just about how it looks—it directly impacts your sound quality, playability, comfort, and motivation to practice. A poorly chosen violin can cause frustration and even physical strain. On the other hand, a violin suited to your size and skill level will boost your confidence, help you develop proper technique, and make the learning process smoother.
2. Consider the Player’s Age and Arm Length
Violins come in different sizes, from 1/16 to full-size (4/4). The most common mistake beginners make is starting with a violin that’s too large. To choose correctly, measure the player’s arm length—from the neck to the middle of the palm. Use this measurement to select the right size:
Under 16 inches: 1/16 or 1/10
16–18 inches: 1/8
18–20 inches: 1/4
20–22 inches: 1/2
22–23.5 inches: 3/4
Over 23.5 inches: 4/4 (Full size) Choosing the correct size is crucial for comfort and proper hand positioning.
3. Decide Between Renting and Buying
For absolute beginners, renting a violin can be a smart way to test commitment before investing in a new one. Renting allows flexibility in size changes for growing children and access to higher-quality instruments without the full upfront cost. However, if you’re confident in continuing long-term, buying a beginner-friendly violin set is more cost-effective in the long run.
4. Set a Realistic Budget
You don’t have to spend a fortune to get a decent beginner violin. Most quality student violins range from ₹6,000 to ₹20,000. Within this range, you can expect a reliable build, acceptable sound, and necessary accessories. Don’t go for extremely cheap violins under ₹3,000—they’re often poorly made and can hinder progress. A budget that includes essentials like a bow, case, and rosin is ideal for new learners.
5. Choose a Violin Outfit for Beginners
Beginner violin “outfits” or starter kits often come with a case, bow, shoulder rest, and rosin. These are essential tools for daily practice. Buying everything together saves time and often ensures compatibility among the pieces. Make sure the bow is well-balanced, the case is lightweight but protective, and the included accessories meet basic quality standards.
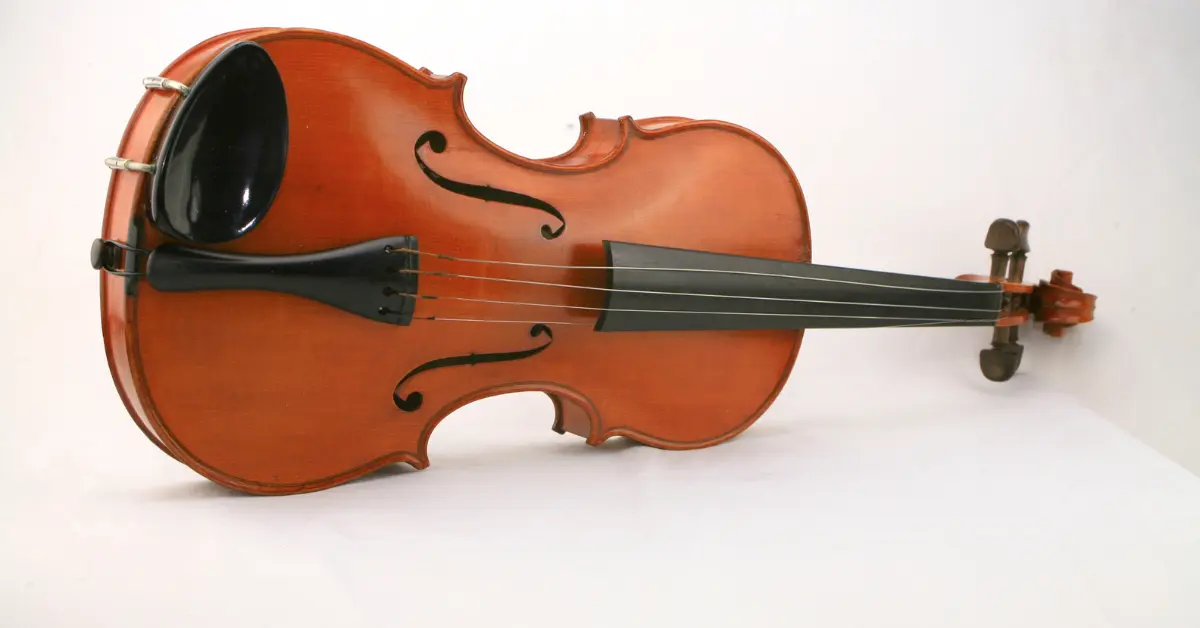
6. Focus on Violin Tonewood and Craftsmanship
Tonewood affects the sound and durability of your violin. For beginners, a violin with a solid spruce top and maple back and sides is ideal. Avoid plastic or plywood instruments. Hand-carved violins usually sound better and are more responsive. Check that the bridge, fingerboard (usually ebony), and pegs are well-aligned and functional.
7. Know the Difference Between Factory-Made and Hand-Crafted Violins
Factory-made violins are mass-produced, often using machines, and are cheaper. Hand-crafted violins, while more expensive, offer better sound quality, durability, and attention to detail. As a beginner, a well-made factory violin from a reputable brand is perfectly suitable, but if you have the budget, a handcrafted piece will make a difference in tone and feel.
8. Evaluate Brand Reputation and Reviews
When learning how to choose the right violin for beginners, brand reputation is important. Brands like Cecilio, Mendini, Yamaha, Stentor, and Eastman are known for producing reliable beginner violins. Read reviews, watch unboxing or demo videos, and get opinions from teachers or music store staff to guide your choice.
9. Check the Setup Quality Before Buying
A violin’s “setup” includes how the bridge is placed, the height of the strings, the position of the soundpost, and the tuning pegs. A poor setup can cause buzzing, difficulty tuning, or uncomfortable playing. If buying from a local music store, ask if the violin has been professionally setup. Online buyers should confirm that the instrument arrives ready to play or get it adjusted at a shop.
10. Visit a Music Store or Try Before You Buy
Whenever possible, visit a local music shop and try out several violins. This helps you feel the difference in tone, weight, neck comfort, and bow tension. Staff can assist in guiding you toward the best choice based on your needs. Even if you plan to buy online, trying a few violins in person gives valuable insight into what feels and sounds right.
11. Ask for Teacher Recommendations
A violin teacher can be an invaluable guide when choosing a beginner instrument. They can recommend trusted brands, appropriate sizes, and accessories. Many instructors prefer students use instruments they’ve personally checked for quality and playability. Their expertise will help you avoid common beginner pitfalls.
12. Know What Accessories You Need
Besides the violin, you’ll need:
A bow with horsehair and good tension
Rosin for the bow
A shoulder rest for comfort
A tuner or tuning app
Spare strings
A soft cloth for cleaning These accessories ensure a smooth playing experience and help maintain the violin’s condition.
13. Consider Electric Violins (If Applicable)
Electric violins are an option for modern beginners who want silent practice or play in amplified settings. They often come in futuristic designs and can be connected to headphones or amps. However, they don’t offer the same acoustic feedback as traditional violins, so they’re not ideal for learning proper tone and bowing techniques at the start.
14. Maintenance and Care for Beginners
Once you’ve chosen your violin, caring for it properly will extend its life and preserve sound quality. Always store the violin in its case, avoid extreme heat or moisture, and loosen the bow when not in use. Clean rosin dust off the body with a soft cloth and get the violin serviced if you notice any tuning or string issues.
15. Look for Beginner-Friendly Features
Some violins come with beginner enhancements like pre-installed fingerboard stickers, lightweight bows, or built-in tuners. These features can make it easier for new learners to practice correctly and stay motivated. Just ensure these additions don’t compromise on build quality.
16. Don’t Ignore the Bow Quality
The bow plays a massive role in tone production. A poor-quality bow can make even the best violin sound bad. Look for a bow made of Brazilwood or carbon fiber, with straight alignment, smooth horsehair, and easy-to-use screw tension. A balanced bow helps beginners develop proper bowing technique with more control.
17. Choose the Right Strings for the Player’s Level
Beginner violins often come with basic steel-core strings, which are durable and stay in tune well. As students progress, they may opt for synthetic-core strings that offer warmer tones. Brands like D’Addario, Pirastro, and Thomastik offer good options across all levels. Strings greatly affect sound and feel, so they’re worth exploring once a solid foundation is built.
18. Take Advantage of Student Discounts or Packages
Many stores offer special pricing for students or first-time buyers, which can include free lessons, discounts on accessories, or free servicing for a limited time. Ask about these offers, especially if you’re buying from a local store or enrolling in a music school. It’s a great way to get more value as you begin your violin journey.
19. Upgrade Gradually as Skills Improve
You don’t need the perfect violin from day one. Focus on finding a reliable, comfortable beginner model. As skills progress, you can upgrade to a better bow, strings, or eventually a more advanced instrument. This progressive approach allows players to grow naturally without the pressure of mastering a high-end violin too soon.
20. Trust Your Ears and Hands
Finally, trust how the violin feels in your hands and how it sounds to your ears. Even beginners can sense when an instrument feels awkward or sounds dull. If it feels good to play and inspires you to practice, that’s a clear sign you’ve made the right choice. Learning how to choose the right violin for beginners is as much about intuition as it is about technical specs.
CONCLUSION
Selecting your first violin is a key step in building a strong musical foundation. From size and tonewood to budget and setup, every detail matters in making the right choice. By understanding how to choose the right violin for beginners, you empower yourself or your child to start this beautiful musical journey with confidence. Use the guidance in this blog to explore your options, ask the right questions, and choose an instrument that nurtures growth, creativity, and joy from the very first note.
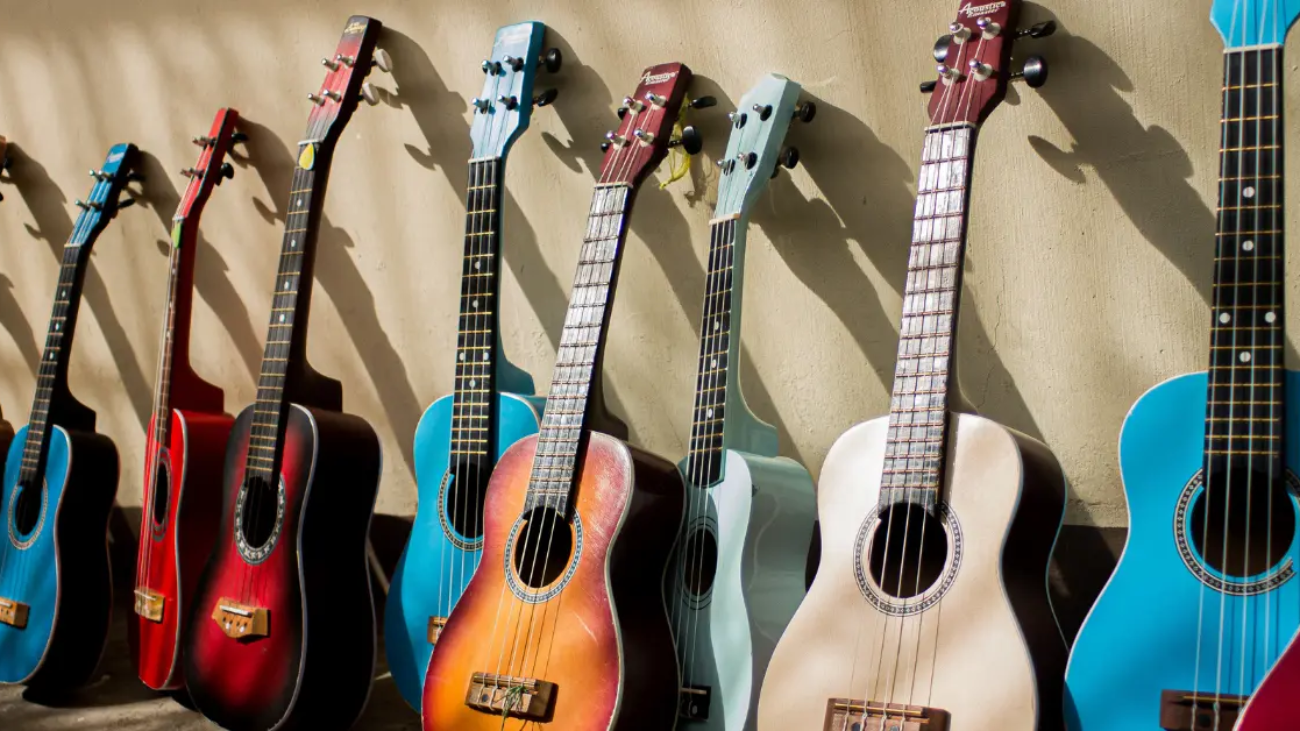
Discover why gifting a musical instrument for boys is a meaningful and exciting way to inspire their creativity and musical journey.
Finding the ideal gift for a boy—one that is exciting, meaningful, and fosters creativity—can be a challenge. If you’re searching for something special that blends fun with value, then look no further than music. Gifting a musical instrument is not just giving an item, it’s handing over an experience, a hobby, and in many cases, a lifelong passion. Whether he’s just beginning his musical journey or already showing signs of musical talent, a thoughtfully chosen instrument can make a lasting impression. In this blog, we’ll explore how to gift a perfect musical instrument for a boy, examining age-appropriate choices, personality-fit instruments, and top picks they’re sure to love.
1. Understand His Interests and Personality
Before buying an instrument, it’s important to know what kind of music excites him. Is he fascinated by rock bands, classical melodies, or electronic beats? A child’s taste in music can help guide your choice of instrument. A boy who loves rhythm may enjoy drums, while someone who is more introverted and reflective might prefer the piano or keyboard.
2. Consider the Boy’s Age and Size
Physical compatibility matters when choosing instruments for children. A full-size guitar might be too large for a young boy, while a compact ukulele could be perfect. For younger kids (ages 4–7), consider instruments like a small keyboard, ukulele, or hand drums. For older kids and teens, instruments like guitars, full drum kits, or even saxophones become viable options.
3. Choose Beginner-Friendly Instruments
Unless the boy already has musical training, opt for instruments that are beginner-friendly and easy to learn. Here are some great beginner picks:
Ukulele – Lightweight, small, and easy to play
Keyboard – Visually intuitive, suitable for learning music basics
Acoustic Guitar (Junior Size) – Great for starting chords and rhythm
Hand Drums or Cajón – A fun way to build rhythm
Recorder or Flute – Affordable and ideal for learning breath control and notes
4. Top 10 Instruments Boys Will Love as Gifts
Ukulele – With only four strings and small frets, it’s easy for small hands and offers quick wins that boost confidence.
Digital Keyboard – Offers tons of sound effects and rhythms; kids love the instant feedback and fun.
Acoustic Guitar – Versatile for various music styles; great for teens and pre-teens.
Electronic Drum Pad – Compact, noiseless (with headphones), and extremely fun to play.
Harmonica – Pocket-sized, fun, and easy to learn—perfect for beginners.
Recorder – Widely used in schools and great for learning to read music.
Violin (Junior Size) – A sophisticated choice for boys interested in classical music.
Bongo Drums – Adds fun rhythm learning for kids and teens alike.
Melodica – A fun blend of keyboard and wind instrument; very interactive.
Electric Guitar Starter Pack – Comes with amp and accessories; excellent for boys wanting a rock-star vibe.
5. Check for Quality and Durability
Kids tend to be curious and energetic, which can lead to a bit of rough handling. That’s why it’s wise to invest in instruments made with good materials, sturdy design, and a reputation for quality. Brands like Yamaha, Casio, Kala, and Fender offer beginner models that balance durability and affordability.
6. Think About the Learning Curve
Pick an instrument that gives the child quick wins—such as playing a simple melody within the first day. This creates excitement and motivates them to continue. A ukulele or keyboard generally offers faster gratification than a violin or trumpet, which have steeper learning curves.
7. Consider the Available Space at Home
Larger instruments like drum sets and digital pianos require more space. Before buying, think about where the boy will be practicing. Compact or foldable instruments are great for small homes or apartments.
8. Look for Accessories That Make It a Full Gift
To make the gift even more special, consider packaging it with essential accessories:
For a guitar: picks, strap, extra strings, tuner
For a keyboard: stand, stool, headphones
For drums: sticks, practice pads, carrying case
For ukulele: gig bag, chord chart, tuner
For any instrument: a beginner’s book or app subscription
9. Think Long-Term: Will He Grow with It?
Choose an instrument that allows room to grow. Some guitars and keyboards have upgrade options or can connect to music software for advanced learning. Avoid toys labeled as instruments—go for real instruments scaled for children.
10. Don’t Forget Personalization
Adding a personal touch to the gift can make it extra special. Consider:
Custom engraving his name on the instrument
Choosing his favorite color
Picking a themed carrying case (cartoon, superhero, etc.)
Including a handwritten note with encouragement
11. Where to Buy the Right Instrument
You can buy quality instruments from:
Local music stores (which often provide warranties and after-sales support)
Trusted online platforms like Amazon, Flipkart, or official brand websites
Specialty stores like NMS Musicals, which offer a curated collection for kids and beginners
12. Add-on Ideas to Enhance the Gift
Want to turn this into a complete music starter pack? Consider gifting:
A small notebook for music journaling
Music theory flashcards
Stickers to label keys or strings
A poster of basic chords or notes
Online beginner course subscription
Conclusion
Gifting a musical instrument to a boy is more than just a gesture—it’s an opportunity to ignite a lifelong passion, boost creativity, and give him a meaningful outlet for expression. By understanding his interests, age, and musical readiness, you can select the perfect instrument that fits his world. Whether it’s the rhythmic excitement of a drum pad, the gentle strums of a ukulele, or the expressive keys of a keyboard, your thoughtful choice can inspire his musical journey from day one. Now that you know how to gift a perfect musical instrument for a boy, go ahead and make a gift that strikes the perfect chord!
Explore the Leading Top Music Schools in Chennai for Professional Instrument Training
Chennai has long been recognized as a vibrant cultural hub with a rich musical heritage that blends traditional Indian and Western influences. For aspiring musicians of all ages, the city offers a plethora of opportunities to learn and master an instrument through dedicated music schools. In this guide, we will explore the top music schools in Chennai that offer instrument training, providing you with an in-depth look at what each institution has to offer. Whether you are a beginner looking to start your musical journey or an experienced player aiming to refine your skills, this comprehensive overview will help you choose the right institution to achieve your goals.
1. The Evolution of Music Education in Chennai
1.1 A Legacy of Musical Excellence
Chennai’s music scene is steeped in tradition with a history that dates back centuries. The city is renowned for its Carnatic music traditions, which have given rise to some of the most celebrated musicians in India. In recent decades, however, Chennai has embraced modern music education, broadening its horizons to include Western classical, jazz, rock, and contemporary music. This blend of tradition and modernity has led to the emergence of world-class music schools that offer diverse instrument training programs.
1.2 The Changing Landscape of Music Schools
In today’s competitive world, music schools in Chennai have evolved to meet the demands of modern learners. Technological advancements, interactive teaching methods, and global collaborations have transformed the way music is taught. Schools not only focus on performance but also on music theory, composition, and digital production, ensuring that students receive a holistic education that prepares them for various career paths in music.
2. Key Features of Top Music Schools in Chennai
2.1 Qualified and Experienced Faculty
The cornerstone of any effective music school is its faculty. The best institutions boast a roster of experienced and renowned musicians who bring deep knowledge and passion to their teaching. These educators use proven methodologies and personalized instruction to help each student unlock their potential.
2.2 Comprehensive Curriculum and Courses
A quality curriculum covers all aspects of music, from practical instrument training to theoretical knowledge. Top music schools in Chennai offer diverse programs, including group classes, private lessons, workshops, and performance opportunities. Many also incorporate modern technologies, such as digital audio workstations and online tutorials, into their teaching.
2.3 State-of-the-Art Facilities and Infrastructure
Modern music schools are equipped with advanced practice rooms, performance halls, recording studios, and libraries stocked with learning resources. These facilities ensure that students have access to an environment that fosters creativity, collaboration, and professional growth.
2.4 Performance and Competition Opportunities
Regular performance opportunities are a critical component of musical education. Leading institutions in Chennai organize recitals, concerts, competitions, and collaborations that allow students to showcase their talent, build confidence, and gain real-world experience in front of live audiences.
3. Top Music Schools in Chennai That Offer Instrument Training
3.1 KM Music Conservatory
KM Music Conservatory, founded by legendary composer A.R. Rahman, is among the most prestigious music schools in Chennai. It offers a wide range of courses in Indian classical music, Western music, and fusion genres. The conservatory’s curriculum is designed to cater to beginners as well as advanced students, with specialized programs for various instruments.
Comprehensive courses covering theory, performance, and composition
World-class faculty with experience in both traditional and contemporary music
Regular live performances, workshops, and masterclasses
State-of-the-art studios and performance venues
Opportunities for international collaborations and exposure
3.2 Shankar Mahadevan Academy
Shankar Mahadevan Academy is another leading institution that offers extensive music training programs in Chennai. Known for blending traditional techniques with modern technology, this academy provides online and offline courses for a variety of instruments.
Flexible learning options, including live online classes
Courses designed by eminent musicians and educators
Interactive lessons with a focus on practical application and performance
Accessible for students of all ages and skill levels
Emphasis on innovation and digital music production
3.3 The Music School Chennai
The Music School Chennai is renowned for its personalized approach to music education. Focused on one-on-one instruction, the school provides customized training sessions in a variety of instruments, including piano, guitar, violin, and drums.
Tailored lesson plans that cater to individual learning styles
Expert tutors with extensive performance and teaching backgrounds
Emphasis on building a strong foundation in music theory and technique
Small class sizes for focused learning and immediate feedback
Performance opportunities to build confidence and stage presence
3.4 Saptak Music School
Saptak Music School has earned a reputation for being an incubator of musical talent. With a diverse range of courses covering both traditional and modern music, this school offers instrument training that is both rigorous and innovative.
Broad curriculum covering various musical instruments and genres
Experienced faculty who emphasize practical, hands-on learning
Regular student concerts, competitions, and collaborative projects
Integration of digital resources to enhance learning and creativity
Focus on developing performance skills alongside theoretical knowledge
3.5 Rhapsody Music Academy
Rhapsody Music Academy is celebrated for its dynamic teaching methods and modern approach to music education. Catering primarily to students interested in contemporary styles, the academy provides extensive training in both Western and Indian instruments.
Courses designed for beginners through to advanced levels
Emphasis on contemporary music styles, including rock, pop, and jazz
Modern facilities including recording studios and performance spaces
Experienced instructors with strong industry connections
Opportunities for collaborations and live performances to gain exposure
4. Factors to Consider When Choosing a Music School in Chennai
4.1 Accreditation and Reputation
When selecting a music school, it is important to consider the institution’s accreditation and reputation. A well-established school with a solid track record is more likely to provide quality education and open up better opportunities for students.
4.2 Course Flexibility and Syllabus
Check whether the courses offered by the school cater to your specific interests. Ensure that the syllabus is comprehensive and includes both practical lessons and theoretical study.
4.3 Faculty Expertise and Teaching Methods
Experienced instructors who use innovative teaching methods can greatly enhance the learning process. Look for reviews and testimonials that highlight the faculty’s expertise and dedication.
4.4 Facilities and Technological Integration
Modern instruments, practice rooms, recording studios, and access to online resources are important factors that can influence your learning experience.
4.5 Cost and Payment Options
Consider tuition fees, additional costs, and available payment plans. Some schools may offer scholarships or discounts for early registrations.
5. Benefits of Instrument Training at a Music School
5.1 Structured Learning Environment
Music schools provide a structured environment that is designed to foster disciplined learning. With scheduled lessons, regular practice sessions, and performance opportunities, students receive consistent guidance and support.
5.2 Exposure to Various Musical Genres
A diverse curriculum allows students to explore different genres and styles of music. This broad exposure not only enhances musical versatility but also stimulates creativity and innovation.
5.3 Social Interaction and Networking
Attending a music school enables you to connect with like-minded individuals who share a passion for music. Group lessons, ensemble practice, and school events help build lasting friendships and professional networks.
5.4 Professional Guidance and Mentorship
Guidance from seasoned professionals can significantly accelerate your progress. Mentors help hone your skills, prepare you for auditions, and advise on career pathways in music.
5.5 Personal and Academic Growth
Music education instills discipline, enhances cognitive abilities, and improves overall emotional well-being. The skills learned through instrument training benefit academic pursuits and personal development.
6. How Music Schools in Chennai are Embracing Technology
6.1 Virtual Classrooms and Online Learning
Modern music schools are increasingly offering online classes. This flexible learning option has made high-quality music education accessible to a broader audience, enabling students to balance studies, work, and personal life.
6.2 Digital Recording and Production
Many institutions now integrate digital recording and music production into their curriculum. Students learn not only to play instruments but also to produce and edit music—skills that are invaluable in today’s music industry
.
6.3 Interactive Learning Tools
From mobile apps to digital sheet music, innovative learning tools enhance the classroom experience. These resources allow students to practice at home, track their progress, and receive instant feedback from instructors.
7. Success Stories from Chennai Music Schools
7.1 Rising Stars in Carnatic and Western Music
Numerous students from Chennai’s top music schools have gone on to achieve national and international acclaim. Their success stories demonstrate the transformative power of quality music education.
7.2 Alumni Achievements and Contributions
Many alumni now occupy prominent roles as performers, composers, and teachers. Their journeys underscore how a strong foundation in instrument training can pave the way for diverse career opportunities within the music industry.
7.3 Inspiring Journeys to Musical Excellence
Personal testimonials and success stories serve as an inspiration for new students. Hearing about others’ achievements fosters motivation, proves that dreams are attainable, and builds confidence in those just beginning their musical journey.
8. How to Enroll in a Music School in Chennai
8.1 Research and Shortlisting
Begin by researching various music schools in Chennai. Look at their course offerings, faculty profiles, infrastructure, and reviews from current and former students.
8.2 Attend Open Houses and Demo Classes
Many schools host demo classes or open house events where you can experience the teaching environment firsthand. These sessions allow prospective students to ask questions and gauge if the institution meets their expectations.
8.3 Application Process and Auditions
Some schools require an audition or a basic assessment of your skills. Prepare by practicing simple pieces and familiarizing yourself with the instrument you plan to study.
8.4 Financial Considerations and Scholarships
Review the fee structure and inquire about any available scholarships or installment plans. Financial support can make top-notch music education more accessible to passionate students.
9. Expert Tips for Maximizing Your Music School Experience
9.1 Set Clear Goals
Define what you want to achieve—whether it’s mastering a specific instrument, composing music, or preparing for competitive exams. Setting clear goals helps you stay focused and motivated throughout your journey.
9.2 Practice Consistently
Regular practice is vital for success in music. Develop a consistent practice schedule, use digital tools to track your progress, and seek feedback from your instructors.
9.3 Engage in Collaborative Projects
Join ensembles, bands, or music clubs available at your school. Collaborative projects not only enhance your technical skills but also teach teamwork, creativity, and adaptability.
9.4 Embrace Criticism and Learn from It
Constructive feedback is essential for growth. Listen carefully to your teachers and peers, and use their feedback to improve your performance.
9.5 Stay Updated with Industry Trends
Music is a dynamic field. Keep an eye on emerging trends, attend workshops, and explore innovative teaching methods that can enhance your learning experience.
10. Future Trends in Music Education in Chennai
10.1 Integration of Artificial Intelligence
Advances in technology are beginning to impact music education. AI-powered tutors and feedback systems can offer personalized practice sessions and help identify areas for improvement.
10.2 Increased Focus on Global Collaboration
Chennai’s music schools are forming partnerships with international institutions, providing students with opportunities to study abroad, participate in global competitions, and gain exposure to diverse musical traditions.
10.3 Expansion of Online Learning Platforms
The trend of virtual classrooms is set to expand, allowing more flexible learning schedules and increased accessibility for students from diverse backgrounds.
10.4 Emphasis on Holistic Musical Development
Future curricula are likely to incorporate not only instrument mastery and theory but also aspects of performance psychology, digital recording skills, and music marketing—preparing students for multifaceted careers in the music industry.
Conclusion
The top music schools in Chennai that offer instrument training stand as beacons of excellence in the realm of music education. With a rich blend of traditional techniques and modern innovations, these institutions nurture talent, foster creativity, and open pathways to professional success. Whether you are a budding musician or a seasoned player looking to refine your craft, enrolling in one of these schools could be the transformative step you need. Embrace the opportunity, invest in your passion, and let Chennai’s vibrant music scene propel you toward a bright musical future. In the end, the journey of musical learning is continuous and deeply rewarding—so start today and watch your dreams take flight.
How to Choose the Right Wind Instrument for School Performances
Choosing a musical instrument for school performances can be exciting but also a bit overwhelming, especially when it comes to wind instruments. Whether your child is just starting in their school band or you’re helping a young student take their first musical steps, selecting the right instrument matters. Wind instruments, ranging from flutes to trumpets and clarinets, offer a variety of tonal colors and playing experiences. In this detailed guide, we will walk you through how to choose the right wind instrument for school performances by understanding the basics, evaluating physical and musical compatibility, and knowing what to look for in a beginner-friendly instrument.
1. Understanding Wind Instruments
Wind instruments are divided into two main categories: woodwind and brass. Woodwind instruments, such as flutes, clarinets, and saxophones, produce sound when air is blown through them and often use reeds. Brass instruments like trumpets, trombones, and tubas produce sound through lip vibrations against a mouthpiece.
Each of these instruments has a unique role in school bands, contributing to harmony, rhythm, and melodic lines. Understanding their differences is the first step toward making a good choice.
2. Evaluate Age and Physical Compatibility
Not every wind instrument is ideal for every student. Some instruments require larger lung capacity or specific hand sizes. For example:
Flute – Lightweight and great for younger students with small hands.
Clarinet – A bit more complex due to its keys but a solid starter woodwind.
Alto Saxophone – Slightly heavier, better suited for middle school and above.
Trumpet – Common for school bands, requires decent lung power and lip control.
Trombone – Needs arm reach for slide positions, often better for older kids.
Always consider how comfortably the student can hold and play the instrument. Trying out a few before committing is a great idea.
3. Choosing Based on Musical Interests
Music is more engaging when it aligns with the player’s interest. Ask the student what type of music they enjoy.
If they love jazz, saxophone or trumpet might be appealing.
If they prefer classical, flute or clarinet is a fantastic choice.
For marching bands, choose instruments that are lightweight and mobile.
Aligning personal taste with instrument tone can increase motivation and long-term commitment.
4. School Band Requirements
Every school has specific instrument needs based on the band’s composition. It’s important to consult the music teacher before purchasing or renting an instrument.
Some bands may lack enough brass players or need more woodwind support.
Your child’s selection might depend on what roles need to be filled.
This practical aspect ensures the student gets opportunities to perform.
5. Try Before You Buy
Most music stores offer trial programs where students can rent an instrument before committing to a purchase. This option is great for:
Understanding comfort and ease of play
Deciding if the student enjoys that particular sound
Avoiding costly investments in instruments they won’t use long-term
You can also rent-to-own, which lets you gradually pay while having the flexibility to return or upgrade.
6. Starter Kits and Accessories
A beginner’s wind instrument should come with basic accessories such as:
Cleaning cloths or rods
Reeds (for woodwinds)
Carrying case
Maintenance oil or grease
Having the right accessories ensures better sound quality and longer instrument life. It also encourages responsible habits in young musicians.
7. Consider Budget and Brands
Budget is always a factor, especially when buying for beginners. Avoid ultra-cheap instruments that can cause more frustration than fun.
Recommended student-friendly brands include:
Yamaha
Jupiter
Jean Paul
Conn-Selmer
Gemeinhardt (especially for flutes)
Entry-level models from these brands strike a good balance between quality and affordability.
8. New vs. Used Instruments
Used instruments can offer excellent value if bought from a reliable source. Look for:
No major dents or cracks
Functional keys and valves
Clean mouthpiece
Recent servicing history
Buying from a certified music store or renting from a school program ensures better quality than buying blindly online.
9. Instructor Recommendations
A music teacher or private tutor can give invaluable advice tailored to the student’s needs. They may recommend specific models, brands, or even have connections for better pricing.
Also, teachers know the student’s playing style, strengths, and areas for improvement—making them the perfect guide.
10. Practice Makes Perfect
The best instrument is the one a student will practice with consistently. Choose a wind instrument that inspires them. Here’s what helps:
Easy to learn fingering
Comfortable embouchure
Quick progress for beginners
Some instruments like flute and trumpet are simpler to produce sound initially, while others like oboe may have a steeper learning curve.
11. Long-Term Potential
While buying an instrument for school use, think beyond a single academic year. Consider instruments that offer growth and opportunities such as:
Participation in state-level competitions
Jazz bands, orchestras, or youth ensembles
Scholarships and music programs in higher studies
Instruments like clarinet, flute, and trumpet can transition well from beginner to advanced levels without needing immediate upgrades.
12. Motivational Factors
Let your child explore online videos of students their age playing different instruments. This exposure helps them visualize themselves performing and creates excitement around learning.
YouTube tutorials
Band performance videos
Instrument comparison vlogs
Seeing other students excel can be a big confidence booster.
13. Instrument Maintenance Basics
Each wind instrument has different care requirements:
Flutes and Clarinets: Daily cleaning to remove moisture and protect pads
Trumpets and Trombones: Regular oiling and greasing to maintain valve action
Saxophones: Swabbing out after every use to protect the reed and body
Teaching maintenance early helps in keeping the instrument performance-ready and long-lasting.
14. Peer Influence and Social Aspects
Sometimes kids choose instruments based on what their friends are playing. While it’s important for them to enjoy band with their peers, make sure the choice also suits their unique aptitude.
That said, playing similar instruments can also help with shared learning and practice.
15. Switching Instruments Later
It’s not unusual for students to switch instruments after their first year. If your child finds a better fit elsewhere, support the switch rather than forcing them to continue. Skills from one wind instrument often transfer to another.
For example:
Flute players can easily transition to piccolo
Clarinet players often switch to saxophone or bass clarinet
Trumpet players might try baritone or French horn
Flexibility can make the musical journey more enjoyable.
Conclusion
Choosing the right wind instrument for school performances doesn’t have to be a daunting task. By understanding the different types of wind instruments, assessing your child’s physical readiness, considering musical interests, and factoring in teacher guidance and school band requirements, you can confidently help them start their musical journey. Always prioritize comfort, quality, and joy—because the best instrument is the one they’ll love to play. With the right support and equipment, your young performer will be well on their way to making magical music in school and beyond.
Explore the Best Instruments to Start playing at Any Age and Start Today!
It’s never too late to start learning a musical instrument! Whether you’re 16 or 60, the power of music is available to anyone who is willing to explore it. The best part? There is a wide range of instruments that are perfect for beginners, regardless of age. Many adults often feel discouraged from starting an instrument because they believe it’s only for children or teenagers. However, that’s far from the truth! Music is a lifelong pursuit, and you can begin at any stage of life.
In this guide, we’ll explore the best instruments to start playing at any age, focusing on beginner-friendly options that offer an easy learning curve. With the right instrument, you’ll not only enjoy learning new skills but also experience the many benefits music has to offer, such as improved brain function, reduced stress, and enhanced emotional expression.
Why Age Shouldn’t Limit Your Musical Journey
Music is for Everyone
One of the greatest misconceptions is that music is only for the young. While many music programs in schools target younger students, the truth is that people of all ages can pick up an instrument and succeed. Whether you’ve always wanted to learn or are just now getting started, music is a journey that can be embraced at any point in life
.
The Benefits of Learning an Instrument Later in Life
Cognitive Boost – Learning music can improve memory, concentration, and even enhance the ability to multitask.
Stress Relief – Playing an instrument helps reduce anxiety and promotes relaxation, making it a great way to unwind after a long day.
Boosts Self-Esteem – Achieving new skills, regardless of age, can significantly boost your confidence and sense of accomplishment.
Now that we’ve established why age should never limit your musical aspirations, let’s dive into the best instruments to start playing at any age.
Top Beginner-Friendly Instruments for Adults
1. Guitar
The guitar is one of the most popular and versatile instruments for beginners of any age. Whether you’re into rock, pop, classical, or folk, the guitar fits almost every genre. It’s a great choice for those looking to start with something relatively easy to learn but that also offers plenty of room for growth as you improve.
Why the Guitar?
Accessible: Guitars are affordable and widely available.
Easy to Start: Basic chords are simple to learn, and there are many tutorials for beginners.
Portable: Guitars are easy to carry around, making practice convenient.
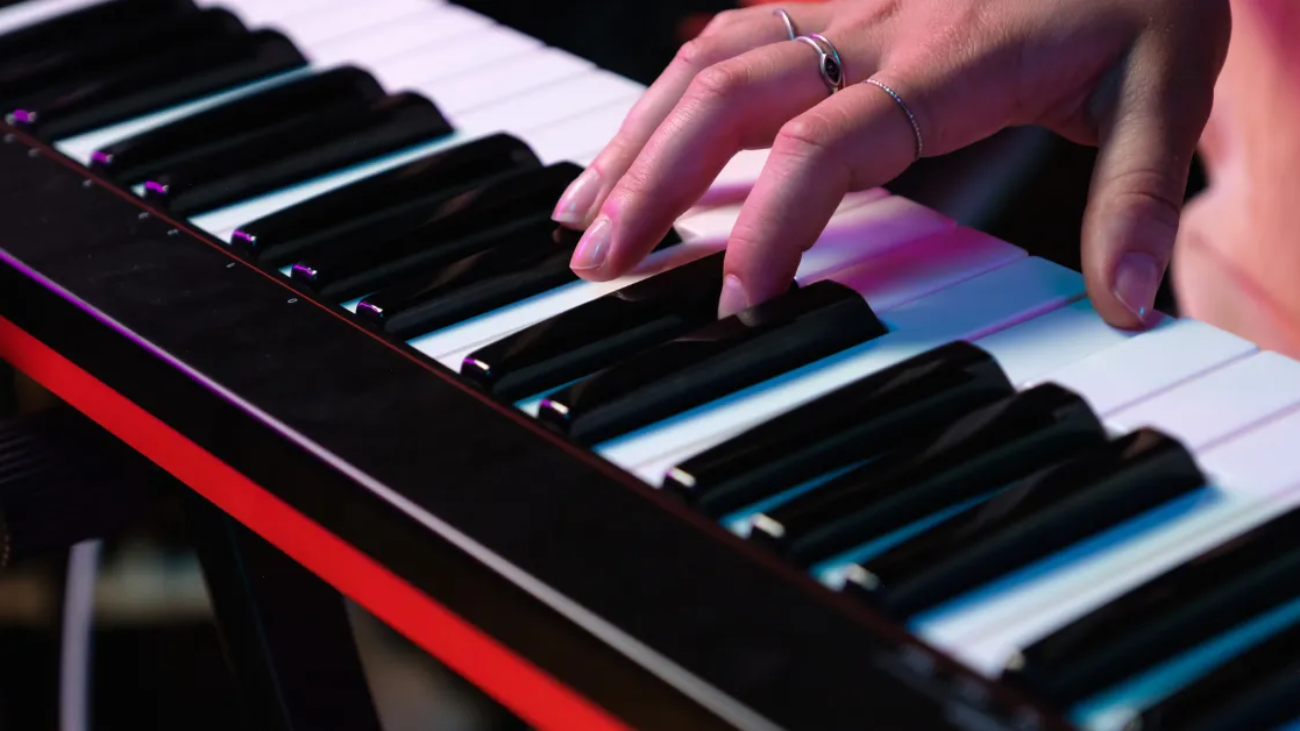
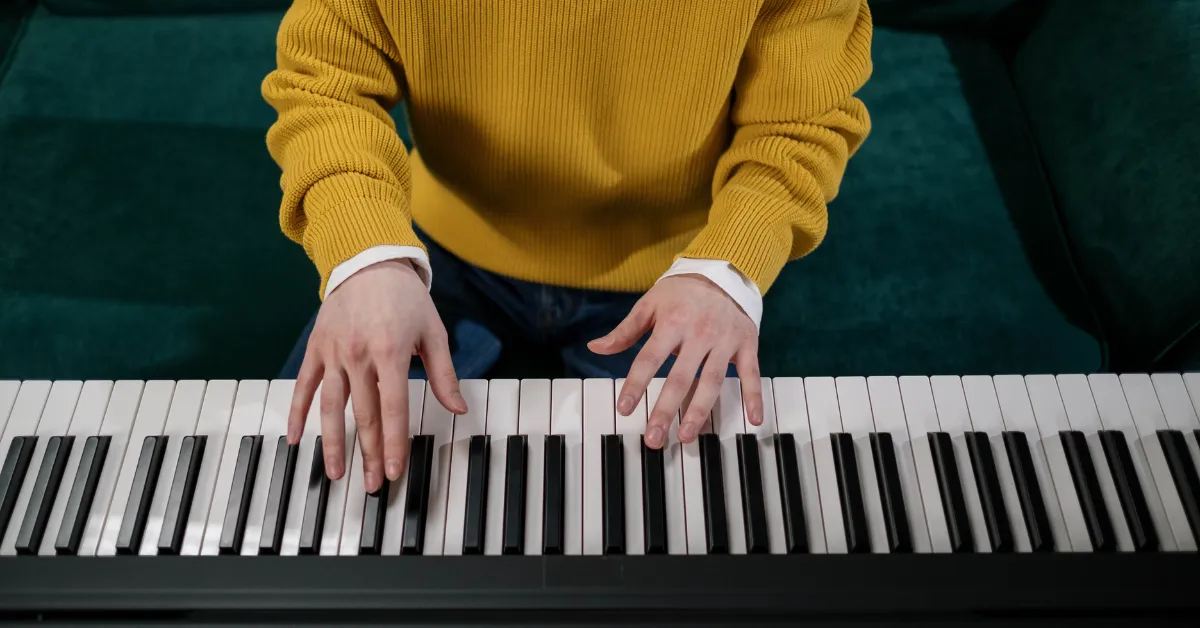
2. Keyboard/Piano
The piano is another excellent choice for adults looking to start playing an instrument. Unlike string instruments, the keyboard’s layout is intuitive, and it’s easy to see how the notes are organized. If you’ve always dreamed of learning piano but thought it was too late, think again! The piano offers a structured learning process that allows you to start with basic melodies and work your way up to more complex compositions.
Why the Piano?
Visual Learning: The layout of the keys helps beginners understand music theory more clearly.
Music for All Styles: The piano is incredibly versatile, from classical to modern music.
Great for Music Theory: Learning the piano gives you a strong foundation in music theory.
3. Ukulele
The ukulele is an excellent beginner instrument due to its small size, lightweight build, and straightforward learning process. It’s especially well-suited for those who are intimidated by larger string instruments like the guitar. With only four strings, the ukulele is much easier to master, and you can start playing simple tunes in no time.
Why the Ukulele?
Simple and Fun: The ukulele’s smaller size and fewer strings make it much easier to learn.
Great for Beginners: Many beginners can learn simple chords and songs within a few weeks.
Portable: The ukulele is small and easy to take wherever you go.
4. Drums/Percussion
Drumming is a fantastic way to express yourself musically, and you don’t have to be a child to pick up the sticks. Whether you’re learning the drums or another percussion instrument like the cajón, these instruments offer an exciting challenge and instant gratification. The physicality of drumming also makes it a fun and active way to engage with music.
Why Drums?
Stress Relief: Drumming is a great way to relieve tension and stress.
No Music Theory Required: Percussion instruments don’t require the same level of theory knowledge, which makes them beginner-friendly.
Great for Coordination: Drumming improves hand-eye coordination and rhythm skills.
5. Violin
While the violin may seem daunting at first, it’s a great instrument to learn later in life. Many adults enjoy the challenge of mastering the violin’s unique technique and the rich sound it produces. While it may take a bit more patience and practice, the violin’s wide range of musical expression makes it an incredibly rewarding instrument to play.
Why the Violin?
Beautiful Sound: The violin produces a hauntingly beautiful tone that appeals to a wide range of musical tastes.
Great for Classical Music: If you love classical music, the violin is essential.
Personalized Learning: You can learn at your own pace, and the violin offers plenty of room to grow musically.
6. Flute
The flute is another fantastic option for older learners, as it requires relatively low physical strength compared to other wind instruments. The flute’s smooth and melodic tones make it a joy to play, and it’s an ideal choice for those interested in classical music, jazz, or contemporary genres.
Why the Flute?
Easy to Transport: The flute is small, lightweight, and portable.
Great for Beginners: Beginners can start playing simple melodies quickly.
Versatile: The flute can be played in many different genres, from classical to contemporary.
7. Saxophone
If you’ve ever been drawn to the sound of a saxophone but thought it was too difficult, now is your chance! The saxophone is an excellent instrument for beginners and provides a rich, soulful tone. It’s perfect for those interested in jazz or contemporary music.
Why the Saxophone?
Rich Sound: The saxophone produces a smooth, jazzy tone that many people find appealing.
Great for All Ages: It’s suitable for both younger and older learners.
Versatile: It works in many genres, from jazz to pop music.
Tips for Starting Your Musical Journey
1. Choose an Instrument That Sparks Joy
The most important factor when choosing an instrument is to find one that excites you. If you’re passionate about the music you want to play, it will be easier to stay motivated.
2. Start with the Basics
It’s important to begin with the fundamentals. Take the time to learn music theory and basic techniques before diving into more complex songs.
3. Practice Regularly
Consistency is key when learning any instrument. Set aside time each day or week for practice, and stick to it.
Conclusion: It’s Never Too Late to Begin
Choosing an instrument to learn is a decision that can greatly enrich your life. Whether you’re 18 or 80, it’s never too late to start playing. The instruments listed above are perfect for beginners of all ages, offering versatility, fun, and a deep connection to music. So go ahead and pick up an instrument today – the journey is just beginning!